Hey, is the motor switched off ? is a question that is very familiar in every household in this modern world. Ours is no different, this was growing like a never-ending story. It was at that time I attended IOT Workshop conducted by Mr. Aravind Padmanaban at IEDF.in ( Currently Devopedia.org ) It seemed that everything happened at the right moment. Rest is the cool mind-blowing project that we implemented at our home.
A typical setup in India would be we have a Sump (Water storage place at ground level) and it would collect the domestic water supplied by Govt and later it would be pumped up to the overhead tank. For this, you need to have a motor. You need to switch on the motor when you have water in the sump and when the overhead tank is empty or nearing emptiness. This is where our problems show up. We never know when the Over-Head-Tank would get empty so that we can switch ON the motor. At times it would get emptied when we are carrying out household errands. Pretty odd right. Somehow we have managed. But managing on a daily basis is not a joke. Being an engineer and tech enthusiast, I can’t keep watching this painful episode day after day like painful episodes that run in Tamil serial that is transmitted in most of the satellite channels. I want to solve this, coincidentally this is when I happen to attend a tech workshop on IoT conducted by Mr. Aravind Padmanaban at IEDF.in ( Currently Devopedia.org ) about using microcontrollers and various sensors.
Water level controller added to Todo list.
Understanding of Arduino and exposure to various sensors led me to Set out on a mission to build water level controller. What should go in the water level controller. What features that are going to be there is the next level of thought process. Finally after lot of brainstroming with few others We decided to settle on the following features.
Features
- Switch ON the motor when the water level in Overhead tank (OHT) is close to empty.
- Switch off the motor when the OHT is full.
- Also avoid dryrun for the motor. Avoid running of the motor without the Sump having water.
- Also we added a cool feature of how much water is we are consuming on LCD.
Few weeks spent on this with one my intern and finally we made this to work.
This is how it looked.
Initial Prototype had exactly what is required.
- Ultrasonic sensors – 2 Nos. (one for OHT, and another for sump, Not shown in the picture)
- LED – 2 Nos. To make sure the sensors are working. You may not be able to see in this picture.
- LCD Panel – To monitor the water level on the OHT and also the motor status. (Switched ON or OFF).
- Arduino Micro Controller.
- A piece of code that had the entire logic of the solution.[Closed Source]
So now we cased the entire circuit on a PCB board. Enclosing it in a sweetbox that I got it from A2B one of my favourites for its awesome delicacies made it a perfect DIY. As DIY are made from scraps available.
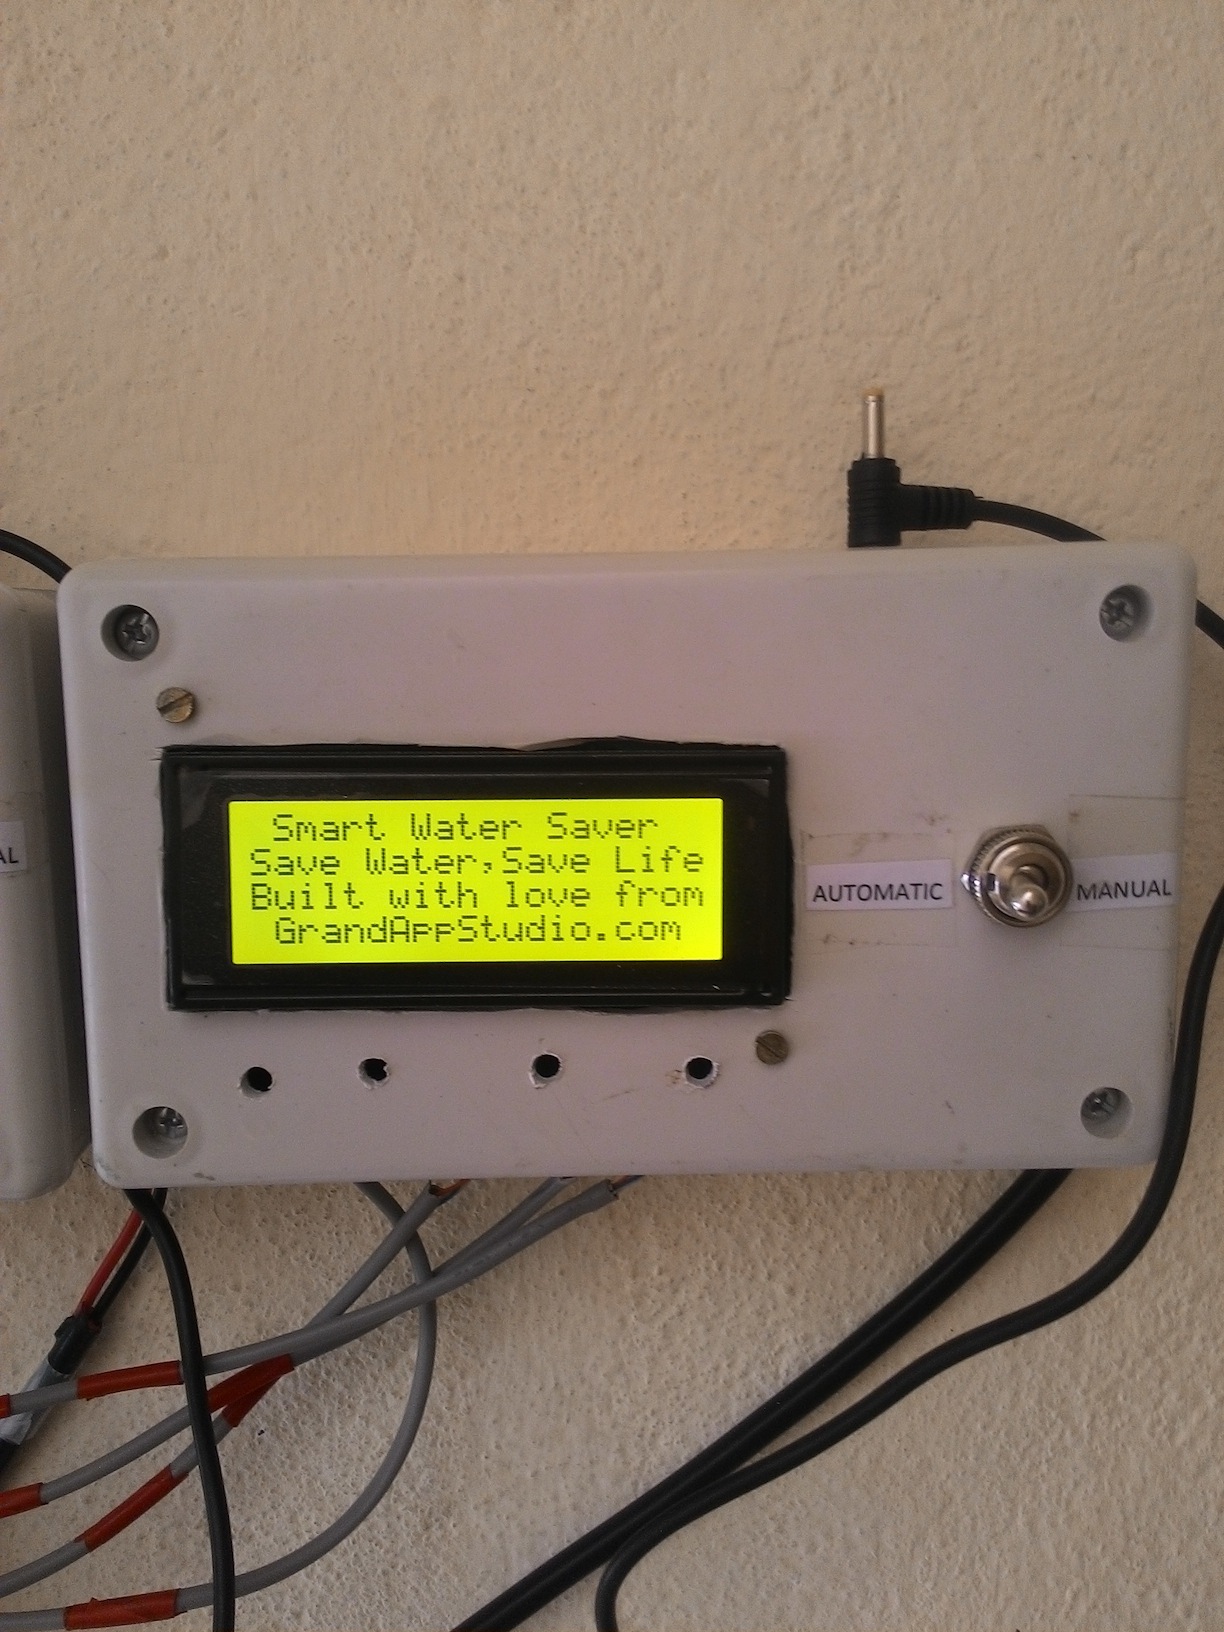
LCD Panel displaying water quantity and Motor status.
Once switched on, that’s all you need to do, It would automatically switch off the motor and switch on the motor. Also, you can see the Current Volume of water in the tank, status of the switch Now it shows as switched OFF.
Problem Solved!
Over a period of time, it worked to be great. It switched ON automatically when the OHT nearing emptiness. That was a great relief to our family. The best part is it switches of the motor when OHT is about to be filled. So Is the motor switched off? Solved. Though it looks simple and yet its promising. Slightly we improvised the controller to have a manual override. Just in case if the motor is not switching ON for some reason, we can still switch ON manually.
Specifications / Configuration
Can work for one Sump and One OHT or multiple connected OHT (Generally all OHT are interconnected at the bottom. If you don’t have OHT connected then we have a customised design Smart Water Saver B)
Operating Volt: 5v DC

 !
!
- Ultrasonic Sensors 2 Nos.
- Water level Controller with LCD Panel
- Power Adapter (220 V AC To 5 V DC)
- Four Core wire : 20 mts.
- Free Installations will be provided.
- Mode Switch (Automatic or Manual) Always keep the knob in Automatic Mode. This will make the water level controller to work automatically switching the Motor. If the motor doesn’t work change it to Manual this will switch ON the motor